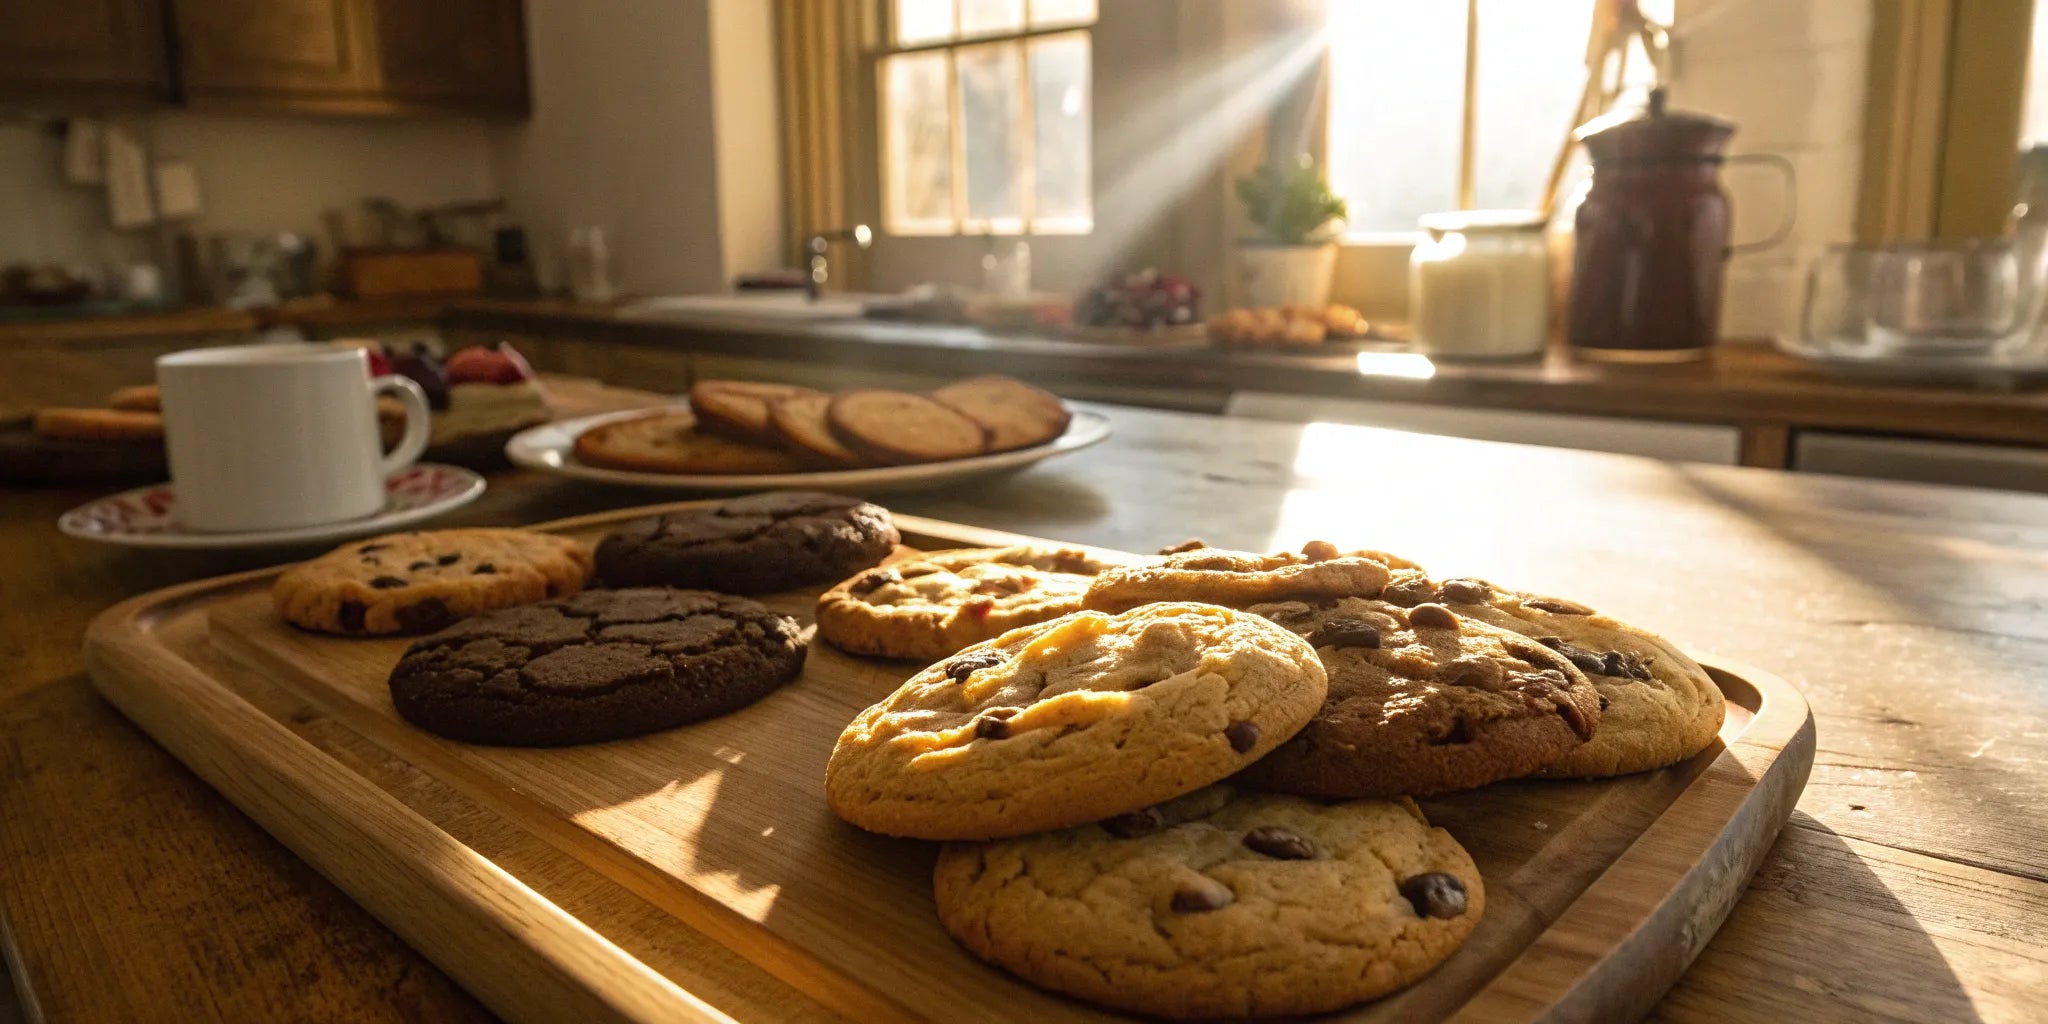
5 Best Cookie of the Month Subscriptions Reviewed
Find the best cookie of the month subscription for your cravings. Compare top clubs, unique flavors, and gift options for a monthly treat delivered to your door.
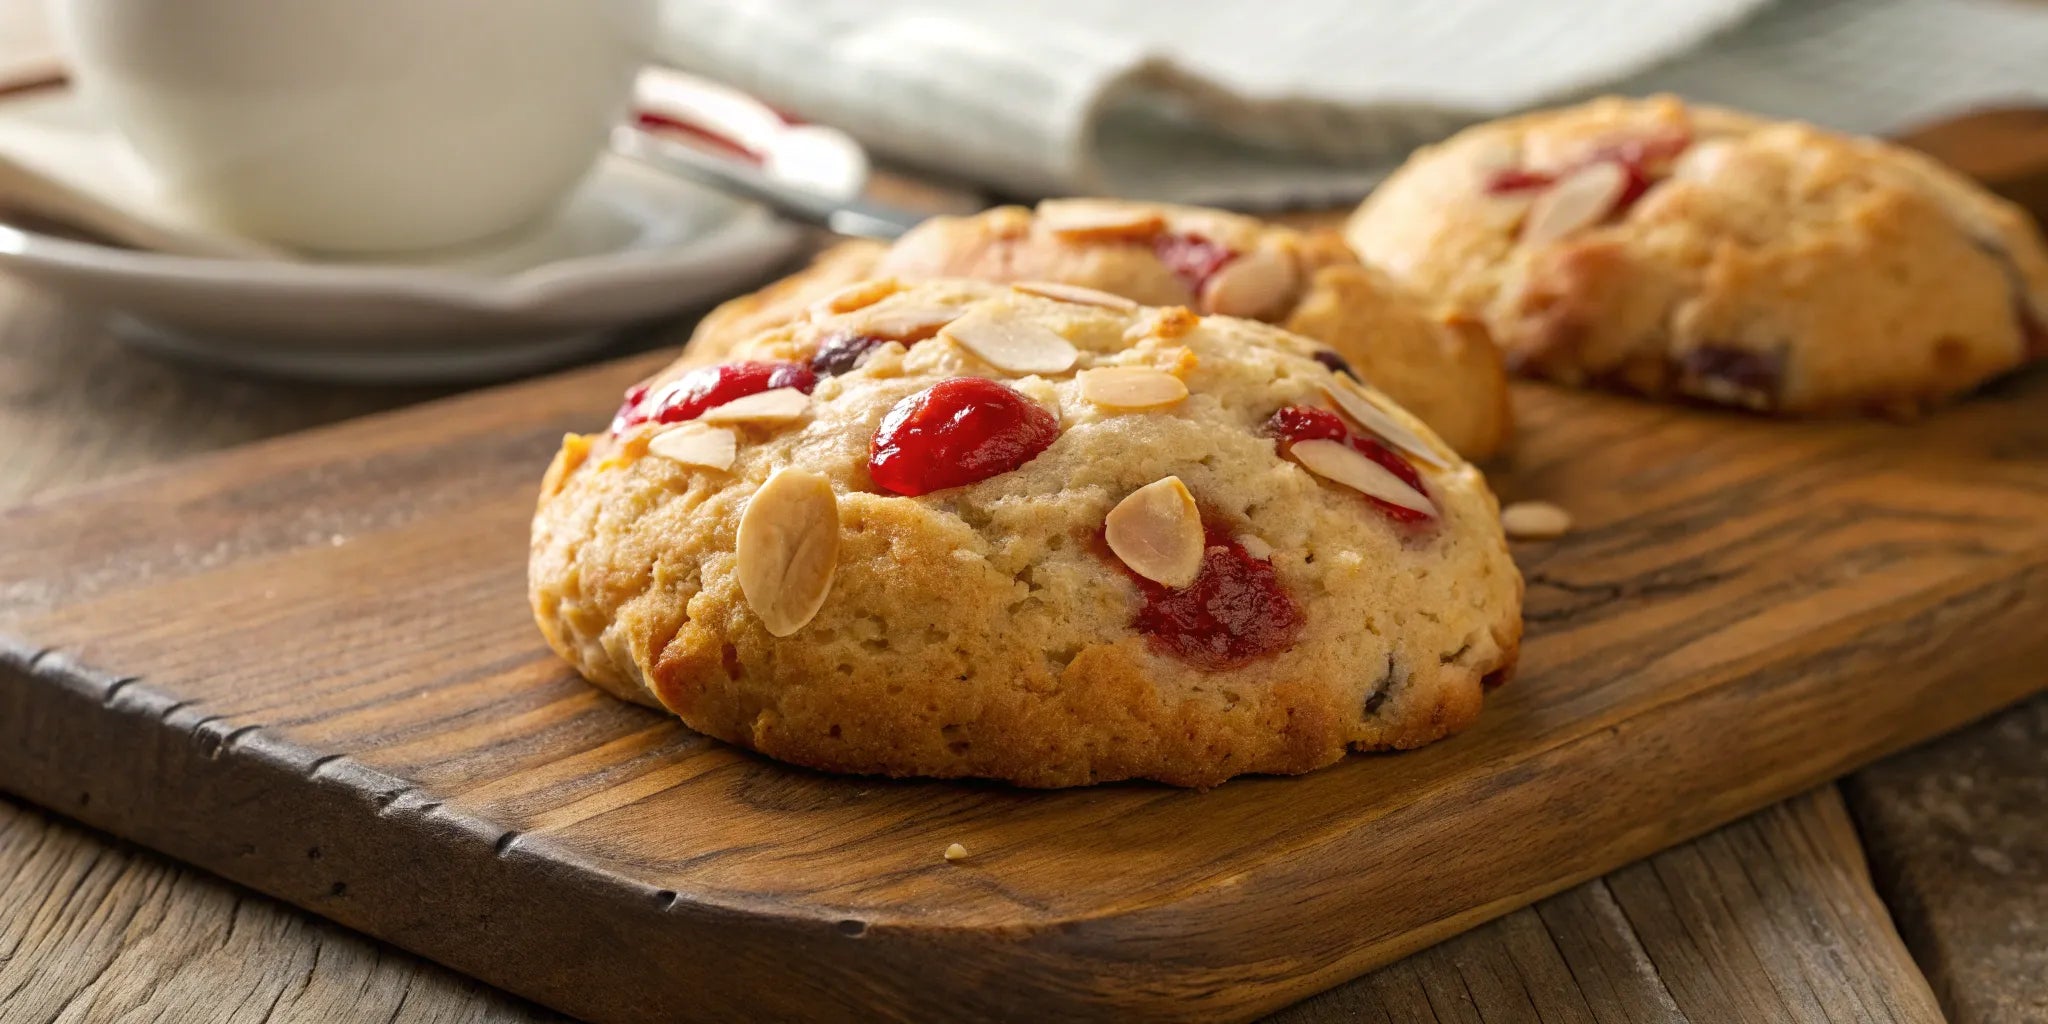
Finding the perfect homemade gift can be a challenge. You want something that looks beautiful, tastes incredible, and feels truly special. Let me introduce you to your new go-to recipe. These Italian Almond Cherry cookies are everything you could want in an edible gift. They are naturally gluten-free, they keep well for days, and their jewel-like appearance makes them perfect for holiday platters, cookie exchanges, or thoughtful care packages. This post is your complete guide to not only baking them to perfection but also storing and packaging them so they look like they came straight from an artisanal Italian bakery.
There's something truly special about a cookie that tells a story. Italian Almond Cherry cookies aren't just a treat; they're a bite of history, a perfect marriage of texture, and a flavor experience that stands out from the crowd. If you're looking for a cookie that's both elegant and comforting, you've found it. These little gems are chewy, packed with nutty flavor, and have a bright, fruity finish that will have you reaching for another. They manage to be simple yet sophisticated, making them perfect for everything from a quiet afternoon with tea to a celebration with friends and family. Let's get into what makes these cookies an absolute must-try.
These beautiful cookies have a rich heritage that starts in Sicily, Italy. Known as 'Paste di Mandorla,' which translates to "almond paste," they are a classic Sicilian treat. For generations, these soft, colorful cookies have been a staple at celebrations. They are traditionally given as gifts for special events like weddings, baptisms, and holidays, symbolizing joy and good wishes. Each cookie is a small piece of that celebratory tradition, crafted with simple, high-quality ingredients. When you enjoy one, you're not just eating a cookie; you're taking part in a sweet piece of Italian history that has been shared and loved for centuries.
The first thing you'll notice about an Italian Almond Cherry cookie is its incredible texture. Forget dry, crumbly cookies—these are delightfully chewy and tender on the inside with a delicate, slightly crisp exterior. This signature texture comes from using almond flour instead of traditional wheat flour, which creates a dense, moist crumb. The cookies are often rolled in powdered sugar before baking, which adds a touch of sweetness and contributes to that lovely crackled finish. The final result is a satisfyingly soft bite that melts in your mouth, offering a perfect contrast between the tender center and the light outer shell.
So, what makes these cookies truly unique? For starters, they are naturally gluten-free, making them a wonderful option for those with dietary sensitivities. The flavor is another standout feature. While almond is the star, it’s beautifully complemented by hints of vanilla and bright citrus zest, like orange or lemon, which cuts through the sweetness and adds a fresh, aromatic quality. It’s important not to confuse them with Amaretti cookies; while both are Italian and almond-based, Amaretti are typically dry and crunchy. These cookies are their soft, chewy cousins, offering a completely different and much more decadent experience.
Before we get our hands dusty with flour, let's talk ingredients. The magic of these cookies is in their simplicity, but using the right components is what makes them truly special. Think of this as your treasure map to finding the perfect ingredients for that authentic, chewy, almond-packed bite. Getting these details right from the start will make the whole baking process smoother and way more delicious.
This is the star of the show, so it's important to get it right. You'll want to look for blanched almond flour, which is made from almonds that have had their skins removed. This gives you a finer texture and a lighter, more uniform color in your finished cookies. Steer clear of almond meal; it’s made with the skins on, which results in a coarser, darker cookie. The right almond flour is the foundation for that perfect chew.
For that sweet, jewel-like center, candied (or glacé) cherries are your best friend. They have the ideal firm texture and won't add extra moisture to your dough. Maraschino cherries, while tempting, are packed in liquid and can make your dough too wet, leading to cookies that spread too much. If Maraschino is all you can find, make sure you dry them very well on paper towels before you even think about chopping them up.
Beyond the almonds and cherries, the core of this recipe is beautifully simple. You’ll need granulated sugar for sweetness and structure, and egg whites to bind everything together. To really make the flavor sing, a good quality almond extract is a must—it deepens that nutty taste we're after. A little bit of honey and fresh lemon zest will also add complexity and brightness, balancing out the sweetness and creating that classic Italian cookie flavor.
Here’s a tip that might go against your baking instincts: do not whip the egg whites. For these cookies, you want to add the egg whites directly into your almond flour and sugar mixture without beating them first. This is the secret to achieving that dense, chewy texture that makes these cookies so irresistible. Whipping the whites would incorporate too much air, giving you a lighter, more meringue-like cookie, which isn't what we're going for here. Trust the process—it’s a traditional technique for a reason.
To cut through the richness of the almonds and the sweetness of the cherries, a little citrus goes a long way. Freshly grated orange and lemon zest adds a bright, fragrant note that makes these cookies feel a little more special. Along with a splash of vanilla extract, the citrus brings a beautiful balance to the overall flavor profile. Don't skip this step; it’s what takes the cookies from good to absolutely unforgettable. The zest brightens everything up beautifully.
Ready to fill your kitchen with the incredible aroma of sweet almonds and cherries? This recipe is surprisingly straightforward, and I’ll walk you through every step. We’re aiming for that perfect chewy texture and rich flavor that makes these cookies so special. The process is simple, relying on just a few key ingredients and techniques to create something truly memorable. Think of it as a fun afternoon project that ends with a delicious, bakery-quality treat you can proudly share. Let’s get our aprons on and start baking.
First things first, let's get your baking station set up. The best part about this recipe is its simplicity—you don’t need any fancy equipment to get started. Forget the stand mixer; all you really need is one good-sized mixing bowl, a spatula, and a cookie sheet. That’s it! By keeping the tools simple, you can really focus on the ingredients and the technique. Before you begin mixing, make sure to line your baking sheets with parchment paper. This prevents the cookies from sticking and makes cleanup so much easier.
Now for the fun part: creating the dough. This is where the magic really begins. The foundation of these cookies is a simple but powerful combination of almond flour, sugar, and egg whites. This trio is what gives the cookies their signature chewy, macaroon-like texture. To build on that amazing base, we'll add a little honey for moisture and depth, along with almond extract and fresh lemon zest to make the flavors pop. Gently fold everything together with your spatula until it’s just combined. You’ll have a sticky, fragrant dough that’s ready for its next step.
I know you’re eager to get these cookies in the oven, but don’t skip this next step—it’s crucial. Once your dough is mixed, it needs to rest in the refrigerator for at least 30 minutes. This chilling period is essential because it allows the flavors to meld and deepen, resulting in a much more delicious cookie. It also makes the sticky dough easier to handle. A great pro-tip is to transfer the dough into a piping bag before you chill it. This makes the shaping process much cleaner and more efficient when you’re ready to bake.
After the dough has chilled, it’s time to give your cookies their classic shape. Using your prepared piping bag, pipe small mounds of dough, about 1.5 to 2 inches wide, onto your parchment-lined cookie sheet. Try to close the circle in the middle as you pipe to create a nice, rounded base. This technique helps the cookies bake evenly and gives them that traditional Italian bakery look. To finish them off, gently press half of a candied cherry into the top of each cookie. This adds a beautiful pop of color and a sweet, fruity bite.
Your kitchen is about to smell amazing! Place your cookies in an oven preheated to 350°F and bake for about 14 to 16 minutes. They should be lightly golden on the edges but still soft in the center. For that perfect bakery-style finish, here’s a little trick: once they’re done baking, switch your oven to the broiler setting for just one to two minutes. This will give the tops a beautiful, toasted color. Just be sure to watch them like a hawk during this step—they can go from golden to burnt in a matter of seconds.
Nailing the perfect Italian almond cookie is all about the details. It’s a delicate dance between chewy and crisp, sweet and nutty. When you get it right, the result is a truly memorable cookie that feels both rustic and elegant. But don't worry, it's not as tricky as it sounds! With a few key tips, you can make sure your cookies come out of the oven with that perfect texture and a beautifully balanced flavor every single time. We'll walk through how to achieve that signature chew, find the right level of sweetness, and fix any common dough issues you might run into.
The magic of these cookies lies in their texture. You’re aiming for a cookie that’s wonderfully chewy and tender on the inside, with just a slight crunch on the outside from the powdered sugar coating. This contrast is what makes them so addictive. The high almond flour content and lack of butter or oil are what create that dense, macaroon-like chewiness. When you’re shaping the dough, the powdered sugar not only prevents sticking but also forms a delicate crust during baking. This is the key to achieving that perfect cookie texture that defines this classic Italian treat.
While these are definitely a sweet treat, you want the flavors of the almond and cherry to be the stars of the show. The goal is a cookie that’s sweet, but not overwhelmingly so. A well-balanced cookie allows the nutty, slightly bitter notes of the almond to come through, complemented by the tartness of the cherry. If the cookie is too sugary, you lose all that delicious complexity. This recipe is designed to hit that sweet spot perfectly, creating a sophisticated flavor that will have everyone reaching for a second one. Getting this balance of flavors right is what separates a good cookie from a great one.
Even the most experienced bakers run into dough issues now and then, so don't panic if yours isn't cooperating. This dough is pretty forgiving and easy to fix. If you find your dough is too dry and crumbly to pipe or roll, simply mix in a little more egg white, a teaspoon at a time, until it reaches a smoother consistency. On the flip side, if your dough feels too wet and sticky to handle, just add a bit more almond flour. Stir in a tablespoon at a time until the dough is firm enough to work with. This simple cookie troubleshooting will get you back on track in no time.
This is one of the most important steps, and it might go against your usual cookie-baking instincts. To keep these cookies soft and chewy, you need to pull them from the oven before they start to brown. Bake them for about 12 minutes at 356°F (180°C). The cookies should look set and be very light in color—almost pale. They might seem underdone, but they will continue to firm up as they cool on the baking sheet. Overbaking is the fastest way to get a dry, crunchy cookie, and we’re going for that signature soft interior. Trust the process and pull them out on time for the perfect result.
One of the best parts of baking is putting your own spin on a classic. This recipe is incredibly versatile, so feel free to play around with it. Here are a few ideas to get you started, whether you're sticking to tradition, accommodating a dietary need, or just feeling creative in the kitchen.
In Italy, especially in Sicily, you'll hear these cookies called Pasticcini di Mandorla, which translates to "almond paste cookies." The goal is a cookie that’s delightfully crisp on the outside while staying soft and chewy on the inside. What’s great is that they are traditionally made with finely ground almonds instead of wheat flour, making them a naturally gluten-free treat that everyone can enjoy. So, when you stick to the classic recipe, you're already using a time-tested, simple, and delicious formula that has been loved for generations.
If you're baking for someone with a gluten sensitivity, you're in luck! This recipe doesn't require any tricky substitutions to be gluten-free, as it’s made with almond flour from the start. This isn't just a substitute; almond flour is the key to the cookie's signature chewy texture and rich, nutty flavor. The combination of the almond flour and the specific baking method creates that perfect crispy-chewy bite. It’s a wonderful example of how simple, high-quality ingredients can create something truly special without needing any complex changes.
The only thing standing between this recipe and a fully vegan cookie is the egg whites. But don't worry, there's a fantastic plant-based swap that works beautifully: aquafaba. If you've never heard of it, aquafaba is simply the liquid from a can of chickpeas. It might sound strange, but it whips up just like egg whites, creating the structure these cookies need. Use about three tablespoons of aquafaba to replace two egg whites, and whip it until it forms soft peaks before folding it into your almond flour mixture. You'll be amazed at the results!
While almond is the star of the show, there's no reason you can't invite other nuts to the party. Try swapping out the almond flour for finely ground pistachios or hazelnuts for a completely different, yet equally delicious, cookie. Keep in mind that different nut flours have varying oil content, so you may need to adjust the recipe slightly. If your dough feels a bit dry or stiff, adding a little extra egg white (or aquafaba) can help you get that perfect, pipeable consistency. Don't be afraid to play around—that's how new favorite recipes are born.
You’ve baked the most amazing Italian Almond Cherry Cookies—congratulations! Now, let's make sure every single one stays as delicious as the first. A little bit of care after they come out of the oven goes a long way. Here are my go-to tips for keeping your cookies perfectly chewy and fresh, plus some fun ideas for serving them.
Patience is a virtue, especially in baking! It’s tempting to snatch a cookie right off the pan, but letting them cool completely on the baking sheet is a game-changer. This crucial step allows the residual heat to finish the job, setting the edges to a perfect crispness while keeping the centers delightfully soft and chewy. Moving them too soon can cause them to break or become too soft. So, give them their space to cool down—I promise the wait is worth it for that signature texture we’re all aiming for.
One of the best things about this recipe is its simplicity. You don’t need a stand mixer or any fancy gadgets to get incredible results. All you really need are the basics: a good sturdy spatula, one large mixing bowl, and a reliable cookie sheet. This is the kind of recipe that proves you can create something truly special with minimal fuss. It’s perfect for a spontaneous baking session or for when you want to get the kids involved without creating a mountain of dishes. It’s all about simple tools and amazing flavor.
To keep your cookies tasting fresh, store them in an airtight container at room temperature. They’ll be at their best for about five to seven days. Here’s a little pro-tip: if you have a cookie tin, use it! A metal tin is better than a plastic container for maintaining that slight crispness on the outside of the cookie. Plastic can sometimes trap moisture and make cookies a bit too soft over time. A tin helps them breathe just enough to stay perfect.
Absolutely! These cookies freeze beautifully, which is fantastic for planning ahead. You can freeze the baked cookies or the unbaked dough balls. For baked cookies, let them cool completely, then wrap them well in a double layer of plastic wrap or place them in a freezer-safe bag. They’ll last for up to three months. When you’re ready for a treat, just thaw them at room temperature. If you’re freezing the dough, place the shaped balls on a cookie sheet to freeze solid before transferring them to a bag. You can bake them straight from the freezer—just add a couple of extra minutes to the baking time.
These cookies are a star all on their own, but they also play well with others. They are absolutely perfect with a hot cup of coffee or an afternoon espresso. For a cozy evening, try pairing them with a sweet dessert wine. Because they are so beautiful, they make a wonderful addition to any holiday cookie platter and are always a huge hit at a cookie exchange. They also make a thoughtful and delicious homemade gift for friends, neighbors, or teachers. Just pack them in a pretty box, and you’re good to go.
My cookies came out hard instead of chewy. What went wrong? The most likely reason for a hard cookie is overbaking. These cookies are meant to be pulled from the oven when they are still very pale and look just set. They will continue to firm up as they cool on the pan. Another thing to check is your egg whites—make sure you're just mixing them in, not whipping them first. Whipping adds too much air, which will create a crispier, more meringue-like texture instead of the dense chew we're after.
Can I use almond meal instead of blanched almond flour? While you technically can, it will definitely change the final cookie. Blanched almond flour is made from almonds with their skins removed, giving you a finer texture and a lighter color. Almond meal includes the skins, which results in a coarser, denser, and slightly darker cookie. For that classic, delicate texture and appearance, sticking with blanched almond flour is your best bet.
Is it better to freeze the baked cookies or the unbaked dough? Both options work great, so it really depends on your goal. Freezing the unbaked dough is perfect if you want that fresh-from-the-oven experience later. Just shape the dough into balls, freeze them solid on a sheet pan, and then transfer them to a bag. You can bake them straight from the freezer. Freezing the fully baked cookies is fantastic for having a ready-to-eat treat on hand. Just let them cool completely before freezing them in an airtight container.
I don't have candied cherries. What else can I press into the center? You can definitely get creative here! A whole blanched almond pressed into the center before baking is a classic and beautiful alternative. You could also use a small dollop of raspberry or apricot jam, or even a few mini chocolate chips. Just be mindful not to use anything with too much moisture, as it could make the cookies spread more than you'd like.
Are these the same as amaretti cookies or macarons? That's a great question, as they all share almond flour as a key ingredient. However, they are quite different. Traditional amaretti cookies are typically very dry and crunchy. French macarons are light, airy meringue-based sandwich cookies with a filling. These Italian almond cookies are their own unique thing—they are dense, soft, and incredibly chewy, offering a much richer and more tender bite than the other two.